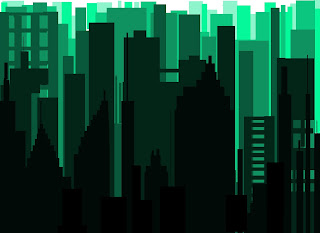
Atmospheric Perspective- Cityscape
Complete the DO NOW HERE!
Now that we have done two landscapes, we're going to create something a bit more familiar to you...
Now that we have done two landscapes, we're going to create something a bit more familiar to you...

Cityscape.
Making a cityscape is just like making our mountain landscape, but instead of the Lasso Tool, we're going to learn a new tool called Rectangular Marquee Tool.
2 Cityscapes are due by the end of next class, Thursday 11/14!
If you'd like Extra Help let me know and I can write you a pass to come in for AM Computer Lab.
Atmospheric Perspective Directions- Cityscape
1) Open Photoshop
2) Go to File- New
Name: Cityscape
Width: 11 inches
Height: 8.5 inches
Resolution: 150-200 pixels/inch
Color Mode: RGB Color
3) Create a New Layer on your Layers tab
It will now be called Layer 1.
4) We're going to use a tool called the Rectangular Marquee Tool
Use your Rectangular Marquee tool to create buildings for your city.
To add to your building, click the Add to Selection button on the top of your screen.
5) In the selected area you created with the Rectangular Marquee Tool, we will now choose a color to color it in with the Paint Bucket tool
**Remember Atmospheric Perspective- will it be a light color or dark color at the front??**
Instructions continued on back —>
6) De-select when done coloring (CTRL-D)
7) Make another NEW LAYER
It will be called Layer 2.
8) On this layer, make another set of buildings with your Rectangular Marquee Tool.
9) Color in your selection with the paint bucket
**Remember Atmospheric Perspective- will it be a lighter or darker color than the front??**
For each new set of buildings, they MUST be on a new layer. Try moving the Layers around if your new building is blocking your previous ones..
10) Continue until you have 5 or more layers.
11) File- Save
.PSD
12) File- Save As
. JPEG
Comments
Post a Comment