Creating a Haunted Castle
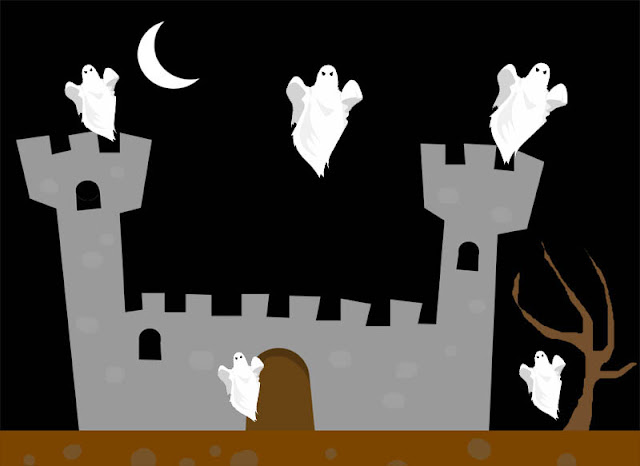
Goal: Copy the ghost and paste at least five copies of it into the castle picture. Use the Transform function on each ghost to change the size of it.
Instructions:
4. Back in Photoshop, paste in the ghost by pressing CTRL - V
5. If your ghost is too big and you want to change its size, we have to Transform it. To do this, press CTRL - T.
6. When done re-sizing your ghost, move it where ever you want to put it. Then, click either ENTER on your key board or the check mark at the top of the screen.
7. If there is black that is blocking the background, you can use a Select Tool (Magic Wand or Quick Selection) to get rid of it.
8. Select the black with one of your selection tools.
9. Click Backspace on your keyboard.
10. De-select by clicking CTRL-D.

Instructions:
 |
1. Save the picture of the castle to your folder.
5. If your ghost is too big and you want to change its size, we have to Transform it. To do this, press CTRL - T.
6. When done re-sizing your ghost, move it where ever you want to put it. Then, click either ENTER on your key board or the check mark at the top of the screen.
7. If there is black that is blocking the background, you can use a Select Tool (Magic Wand or Quick Selection) to get rid of it.
8. Select the black with one of your selection tools.
9. Click Backspace on your keyboard.
10. De-select by clicking CTRL-D.
7. Ta dah! You're done with your first ghost. Now do this 4 more times so you have 5 ghosts haunting the castle.
8. Remember to always do a normal Save to have a .PSD version of your work, and then do a Save As to make it a .JPEG.
9. Post the final .JPEG image to your blog.
9. If you did not post your color changing image last time, please do so today!
8. Remember to always do a normal Save to have a .PSD version of your work, and then do a Save As to make it a .JPEG.
9. Post the final .JPEG image to your blog.
9. If you did not post your color changing image last time, please do so today!


Comments
Post a Comment