Mirroring Your Zentangle

You may be done with your zentangle (cleaning up and coloring), but here's another technique you can apply to your zentangle! It is a mirroring technique. You can either mirror once or twice, depending how complicated you want your design to be.

Mirrored 1x

Mirrored 2x
The following steps are also available to you as a worksheet/packet to follow. It is up at the front of the room.
Step 1: Duplicate The Background Layer
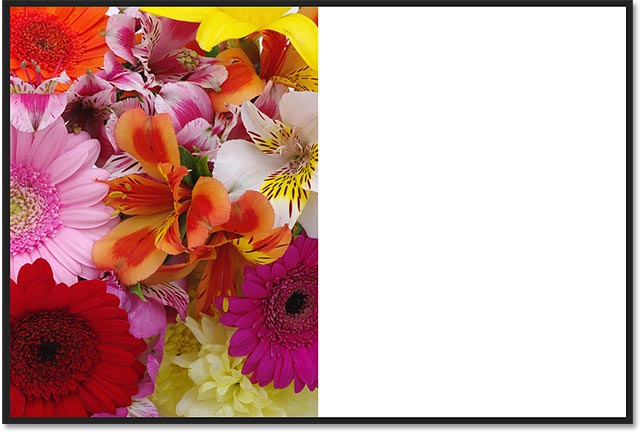
If we look in our Layers panel, we see our image sitting on the Background layer, currently the only layer in the document:

The Layers panel showing the cropped image on the Background layer.
We need to create a copy of this layer. To do that, click on the Background layer and drag it down onto the New Layer icon at the bottom of the Layers panel (second icon from the right):

Dragging the Background layer onto the New Layer icon.
Photoshop makes a copy of the Background layer, names it "Background copy" and places it above the original:

The "Background copy" layer appears.
Step 2: Double The Width Of The Canvas
Go up to the Image menu at the top of the screen and choose Canvas Size:

Going to Image > Canvas Size
This opens Photoshop's Canvas Size box which we'll use to add more canvas space around our photo. We need to double the current width of our canvas, and we want all of the extra canvas space to appear to the right of our image. To do that, set ...
Width value to 200 percent
Leave the Height at 100 percent
Leave the Relative option unchecked. To force the extra canvas space to the right of the photo, click on the left middle square in the Anchor grid:

Click OK when you're done to close out of the dialog box. By default, Photoshop fills the extra canvas space with white. If, for some reason, yours isn't white, don't worry because it's not important:
Step 3: Drag The Photo On The "Background copy" Layer To The Right
Now that we've added our extra canvas space, we need to drag the copy of our photo on the "Background copy" layer into the new area. Select Photoshop's Move Tool from the Toolbar:

Make sure the "Background copy" layer is selected in the Layers panel. Then click on the photo and drag it over to the right side of the original image. When you're done, release your mouse button. You should now see two copies of the photo sitting beside each other:

Step 4: Flip The Image On The Right Horizontally
So far, all we have are two identical photos. Let's create our first mirror effect by flipping the image on the right horizontally so it appears as a reflection of the one on the left.
To do that, go up to the Edit menu at the top of the screen, choose Transform, and then choose Flip Horizontal:

The photo on the right instantly becomes a mirror reflection of the photo on the left, creating our first effect:

The two images are now mirror reflections of each other.
Step 5: Merge The Two Layers Together
So far, so good. Let's merge our two layers into a single layer by going up to the Layer menu at the top of the screen and choosing Merge Down:
\

Nothing will seem to have happened in the document, but if we look at our Layers panel, we see that our two layers have been merged into a single Background layer:

Step 6: Duplicate The Layer
Just as we did back in Step 2, let's duplicate the Background layer by clicking on it and dragging it down onto the New Layer icon:

Photoshop again duplicates the Background layer, names it "Background copy" and places it above the original:

Step 7: Double The Height Of The Canvas
We're going to create another reflection of our image, this time vertically.
Go up to the Image menu at the top of the screen and choose Canvas Size:

When the dialog box appears, set ...
Width to 100 percent (which will leave the width at its current size) and the
Height to 200 percent.
Leave the Relative option unchecked.
To force the extra space to appear below the image, click on the top middle square in the Anchor grid:

The settings for doubling the height of the canvas.
Click OK to close out of the dialog box. Photoshop adds the additional canvas space below the image.

The extra canvas space appears below the image.
Step 8: Drag The Image Below The Original
With the Move Tool still selected and the "Background copy" layer selected in the Layers panel, click on the image and drag it down into the extra canvas space.

Dragging the image on the "Background copy" layer below the original.
Step 9: Flip The Bottom Image Vertically
To turn the bottom image into a mirror reflection of the top one, go up to the Edit menu, choose Transform, and then choose Flip Vertical:

We now have our second mirror reflection, this time vertically. Things are already starting to look interesting:

The bottom image is now a reflection of the top image.


Comments
Post a Comment