Posts

Showing posts from October, 2019

Creating a Haunted Castle

Image
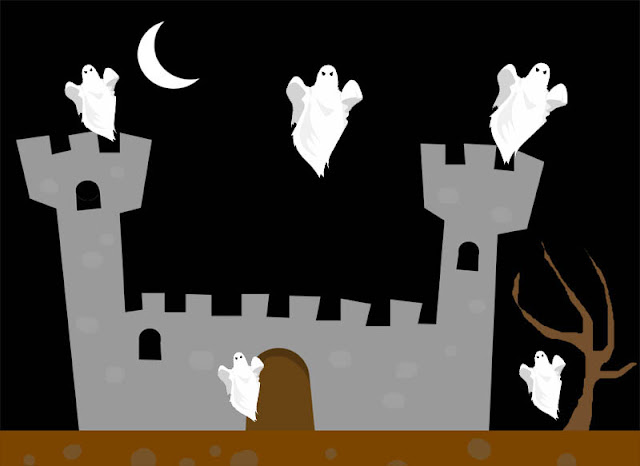
Goal :  Copy the ghost and paste at least five copies of it into the castle picture. Use the Transform function on each ghost to change the size of it.  Instructions:     1. Save the picture of the castle to your folder. 2. Open the castle picture in Photoshop. 3. Right click on the ghost to Copy Image   4. Back in Photoshop, paste in the ghost by pressing CTRL - V 5. If your ghost is too big and you want to change its size, we have to Transform it . To do this, press CTRL - T .  6. When done re-sizing your ghost, move it where ever you want to put it. Then, click either ENTER on your key board or the check mark at the top of the screen.  7. If there is black that is blocking the background, you can use a Select Tool (Magic Wand or Quick Selection) to get rid of it. 8. Select the black with one of your selection tools. 9. Click Backspace on your keyboard.  10. De-select by clicking CTRL-D . 7. Ta dah! You're done with your first ghost. Now do th

Playing with Photoshop- Selection & Changing Color

Image
Change the Color of an Object 1) Save the image in your folder. 2) Open the image in Photoshop. 3) Use a Selection Tool to select only the pumpkin. You can use one of two tools... The Quick Selection Tool or the Magic Wand tool will let you choose/select part of the image you want to work with. 4) After the pumpkin is selected, we can now change the color. To do so, find the Adjustments tab on the right hand side.       **If you do not have the Adjustments tab, go to the top of the screen to  Window -  Adjustments ** 5) Click on the Hue/Saturation tool. It's the second tool on the second row.   6) Now try messing around with the Hue control on the top. Observe what is happening to the color of the pumpkin. Is it the same or different? 7) When done with the Hue/Saturation tool, you're done! You're pumpkin should now be a different color. Now, try changing the color of an object in another image! Below are some images for you to try, or you may find your

Final Zentangle due today!!

Your final Zentangle is due TODAY by the end of class. Make sure that it is posted on your Media Arts blog.  When done posting, you must complete and hand in the Zentangle rubric to self-assess yourself. DOING THIS IS A QUIZ GRADE !! If you are done with all of the above, you will take a set of Mirror image instructions from the front. Using an image from Google, you should follow the directions step by step to create your own mirror image. When done, please submit on your class blog as well. You may do more than one of these mirror images. 

Mirroring Your Zentangle

Image
You may be done with your zentangle (cleaning up and coloring), but here's another technique you can apply to your zentangle! It is a mirroring technique. You can either mirror once or twice, depending how complicated you want your design to be. Mirrored 1x Mirrored 2x The following steps are also available to you as a worksheet/packet to follow. It is up at the front of the room. Step 1: Duplicate The Background Layer If we look in our Layers panel , we see our image sitting on the Background layer , currently the only layer in the document: The Layers panel showing the cropped image on the Background layer. We need to create a copy of this layer. To do that, click on the Background layer and drag it down onto the New Layer icon at the bottom of the Layers panel (second icon from the right): Dragging the Background layer onto the New Layer icon. Photoshop makes a copy of the Background layer, names it "Background copy" and places it above

Do Now & Continue Working on Zentangle

CLICK HERE FOR THE DO NOW When done with the Do Now, open up your zentangle in Photoshop and continue working on it. For help, please check the following... Class blog... Any worksheets I have given out (more available up front)... The person next to you... .. . before calling me over. 

Photoshopping Your Zentangle

Image
To open your zentangle in Photoshop, go up to the top of the page to File-Open Find your Folder and then open your zentangle image. Awesome! You have your image up and ready to edit! The first thing we are going to do is Crop the image.  The Crop tool looks like a square with a diagonal line through it. When using the Crop tool, you are making a box around what you want to keep. Now, lets crop our zentangle, getting rid of everything the outside of the box we drew in. When done making your crop, click ENTER or the Check Mark on the top right of the screen.  _ _ _ _ _ _ _ _ _ _ _ _  Once the image is cropped, we are going to work on cleaning up some of the image.  If I were to zoom in to the image, I notice some stray lines/marks in the images. I want to get rid of those. Before we paint anything though, we need to make sure we match the color correctly. To do so, we are going to use the Eyedropper tool .   After we have chosen it, we can click anywhere on the image tha